
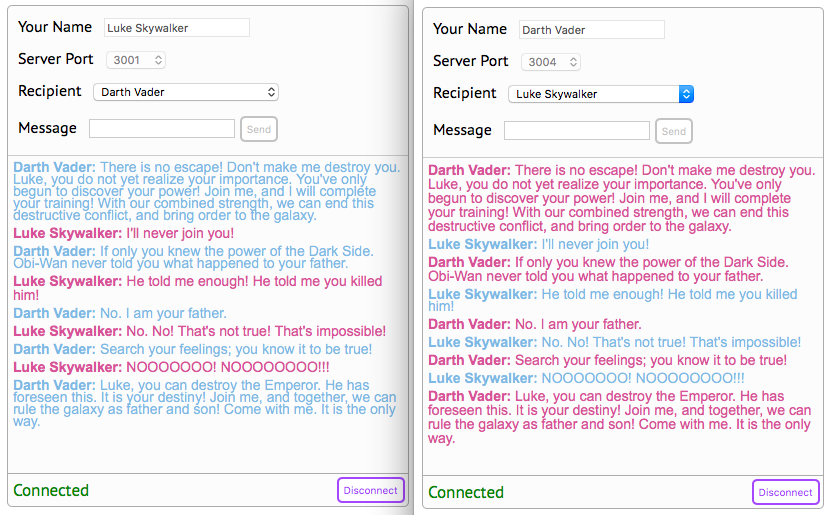
Just two users casually chatting.
Let’s build a non-trivial app with React and then refactor it to use Redux!
Much of the advice you get regarding the addition of Redux to your React projects is to only do so once they reach a certain size, because of the extra complexity Redux adds. That’s certainly fair. But it will leave you with a bit of technical debt (refactoring to be done later) that you wouldn’t have if you just started out with React and Redux.
Consequently, I thought it might be nice to present an exercise where we do just that: build an app as simply as possible using React and ReactDOM alone (not even JSX since you need more dependencies and a build process to support that), and then refactor to use JSX and Redux.
In a previous post, I described my Node-based multi-server chat project, which had a rudimentary Javascript client built in. Though all of the system functionality could be tested with several instances of that client, it was lacking in a number of ways:
- It only allowed you to connect with two predefined users (this one provides freeform username input, so any number can connect).
- It didn’t show scrollable message history, although you could see the latest message sent or received on one line.
- It didn’t show you a list of all other users connected to the server mesh, it just logged the user list to the console whenever the server updated the client.
- It didn’t alert you when your selected recipient had disconnected or reconnected.
- It didn’t support message threads (this client automatically shows the appropriate thread and selects the recipient after an incoming message is received).
And as minimal as it was, that client was right at the edge of complexity where a framework of some sort would be welcome. So in this post, I’m going to build a more fully featured client to communicate with that same chat server.
The First Cut: React and ReactDOM
In the most minimalistic React project, you just pull in React and ReactDOM then use React.createElement() to render your components (which extend React.Component). You can see the first version of the project on its 1.1.0 tag.
In that version of the project, the HTML template looks like this:
react-chat-client.html
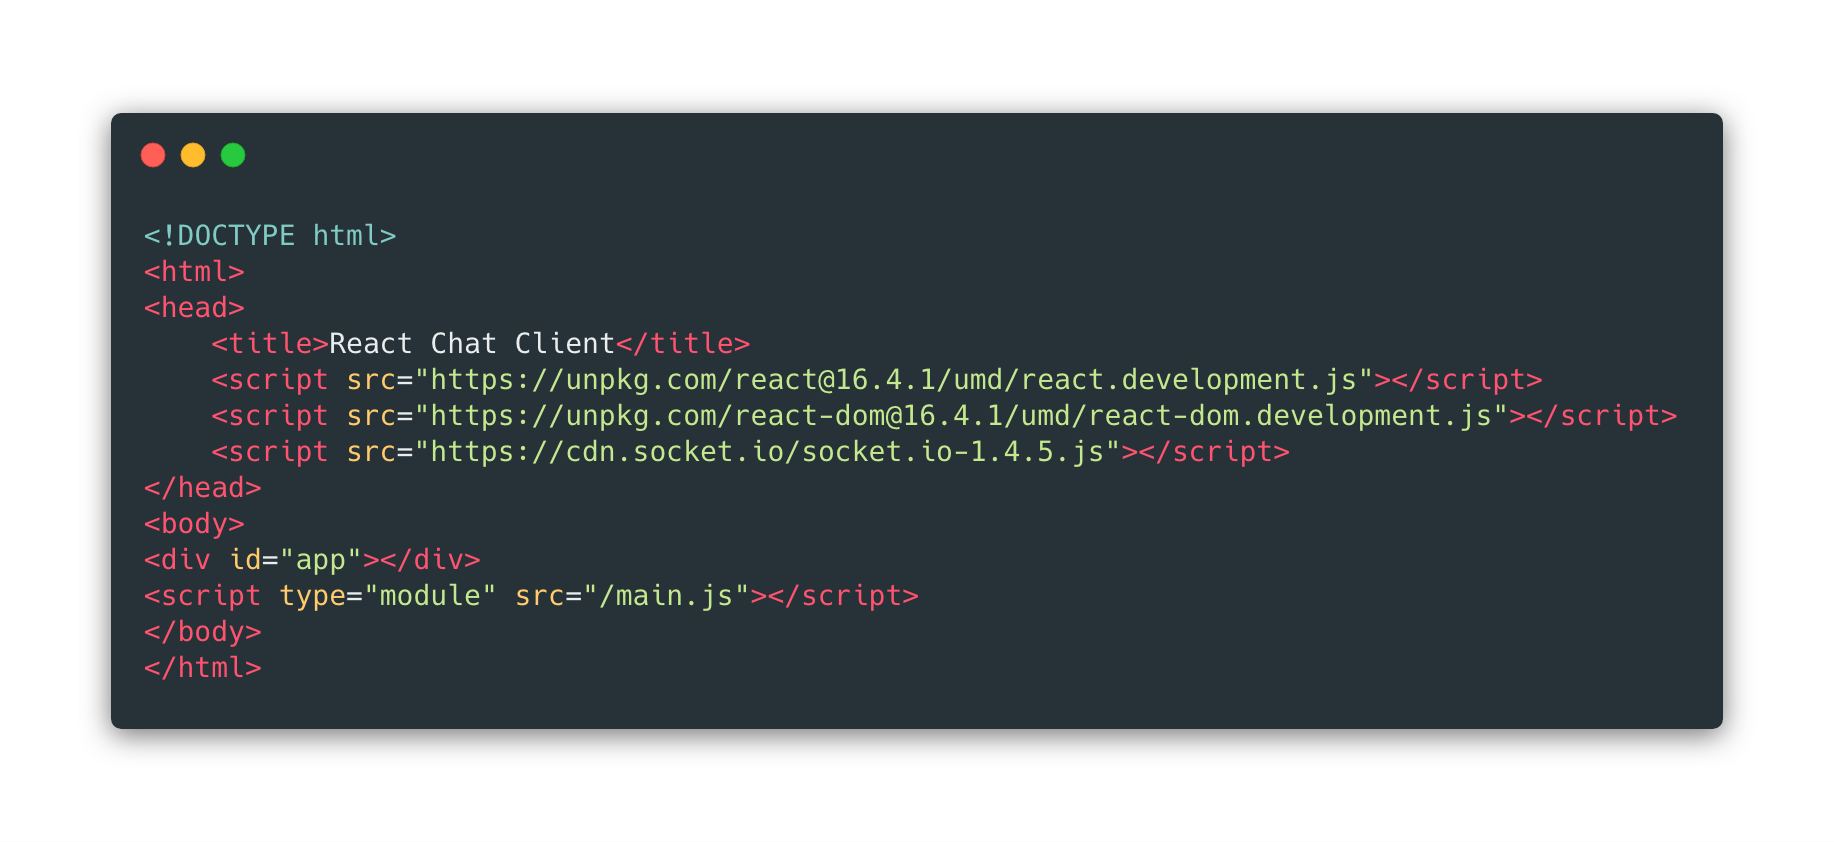
Note how it uses script tags to pull in its dependencies React, ReactDOM, and Socket.io from CDN urls, and the main.js file that is the entry point to the app. This allows us to serve the app with a simple Express server like this:
client-server.js

That sidesteps a lot of mental friction associated with React toolchain setup. No need for create-react-app, Babel, Webpack, etc.
Application Structure
In this first cut, the app code only consisted of four files, tucked away in one folder.
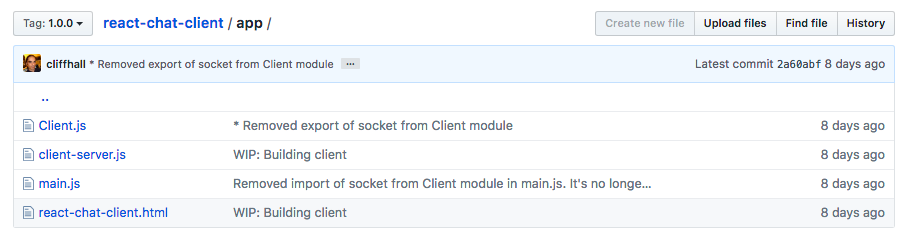
You’ve already seen two of them above client-server.js and react-chat-client.html. The other two are:
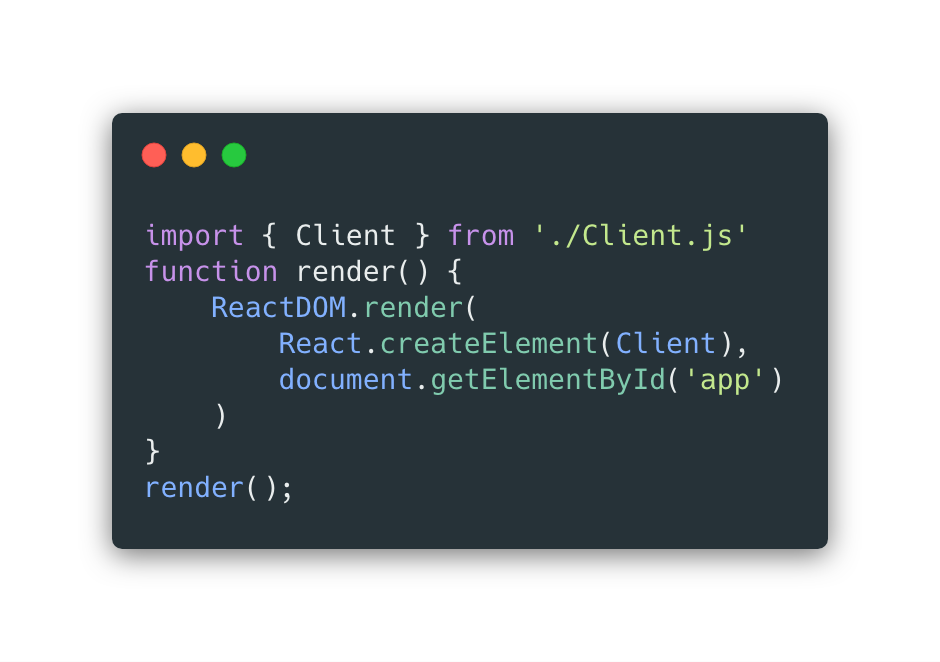
Main.js
This file couldn’t be simpler and just rendered the Client class as a DOM element replacing the ‘app’ element in the HTML template. Recall it was referred to in a script tag in the body of the template.
Client.js
This one is monolithic, weighing in at exactly six-hundred lines. I won’t duplicate it here, but It’s worth taking a look at in the repo. Monolithic classes are hard to maintain and reason about, particularly if there is more than one person on the team.
This file defines all the protocol, styles as CSS-in-JS, and so forth in constants that all components in the file can see. It also defines all the components, and without hoisting, they have to be defined before they are referred to, so the client component is defined last and the all the others come before it, and so on with nested components. This non-obvious ordering requirement is another reason monolithic files are bad.
React.createElement vs JSX
One thing I will point out here, is how even though it is possible to do React without JSX, your render methods look like this:
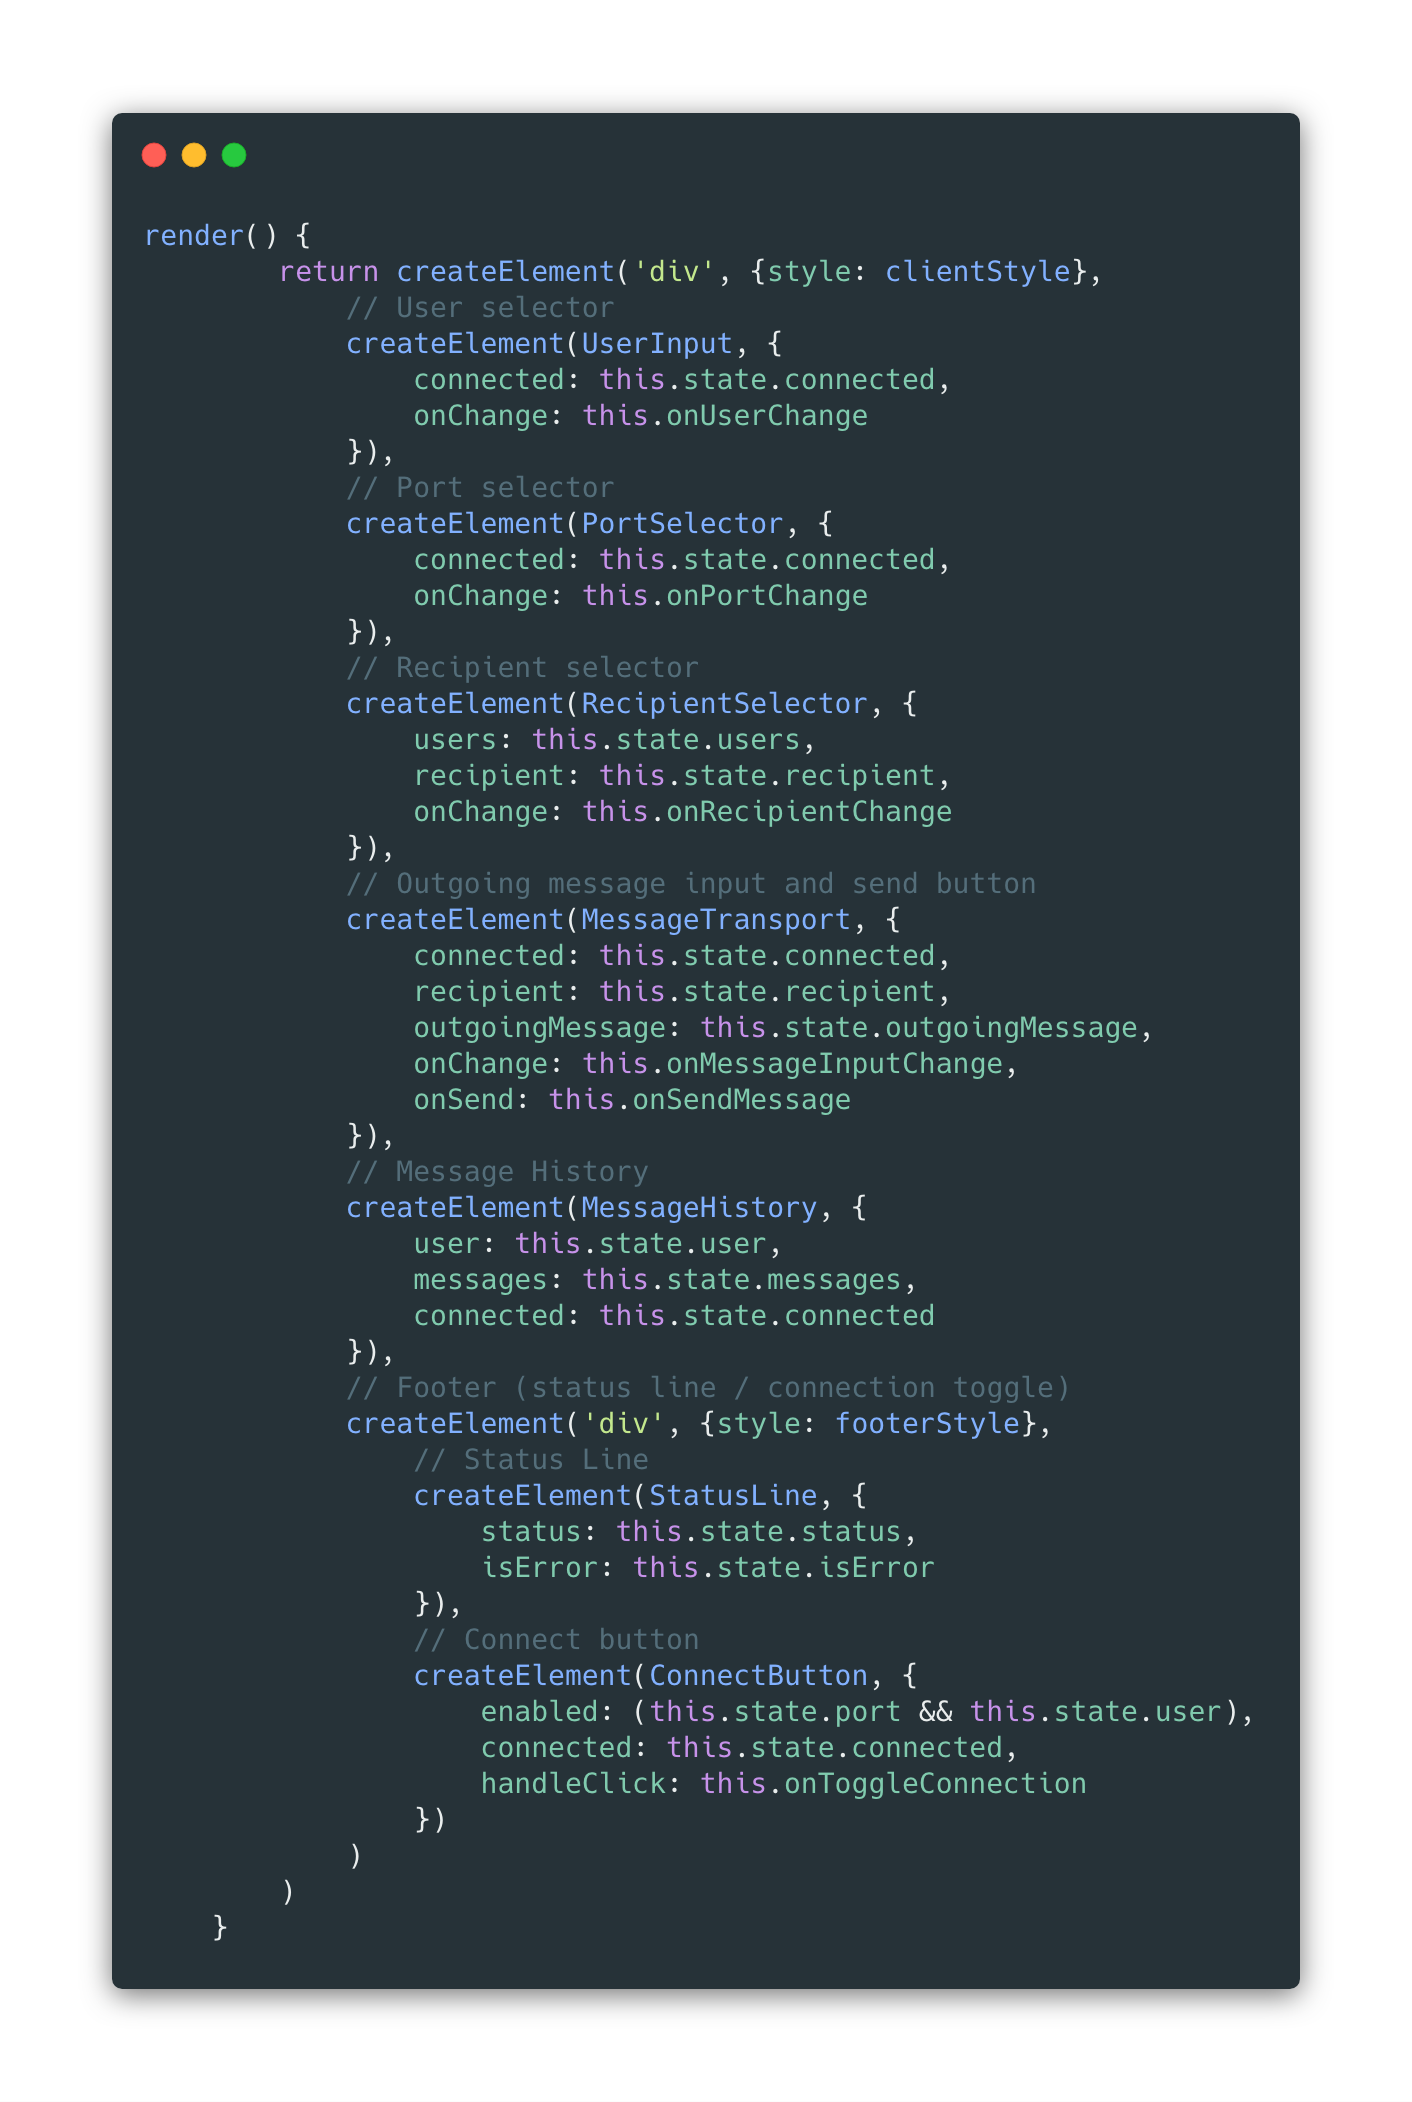
instead of this one, from version 1.1.0 where JSX was added:
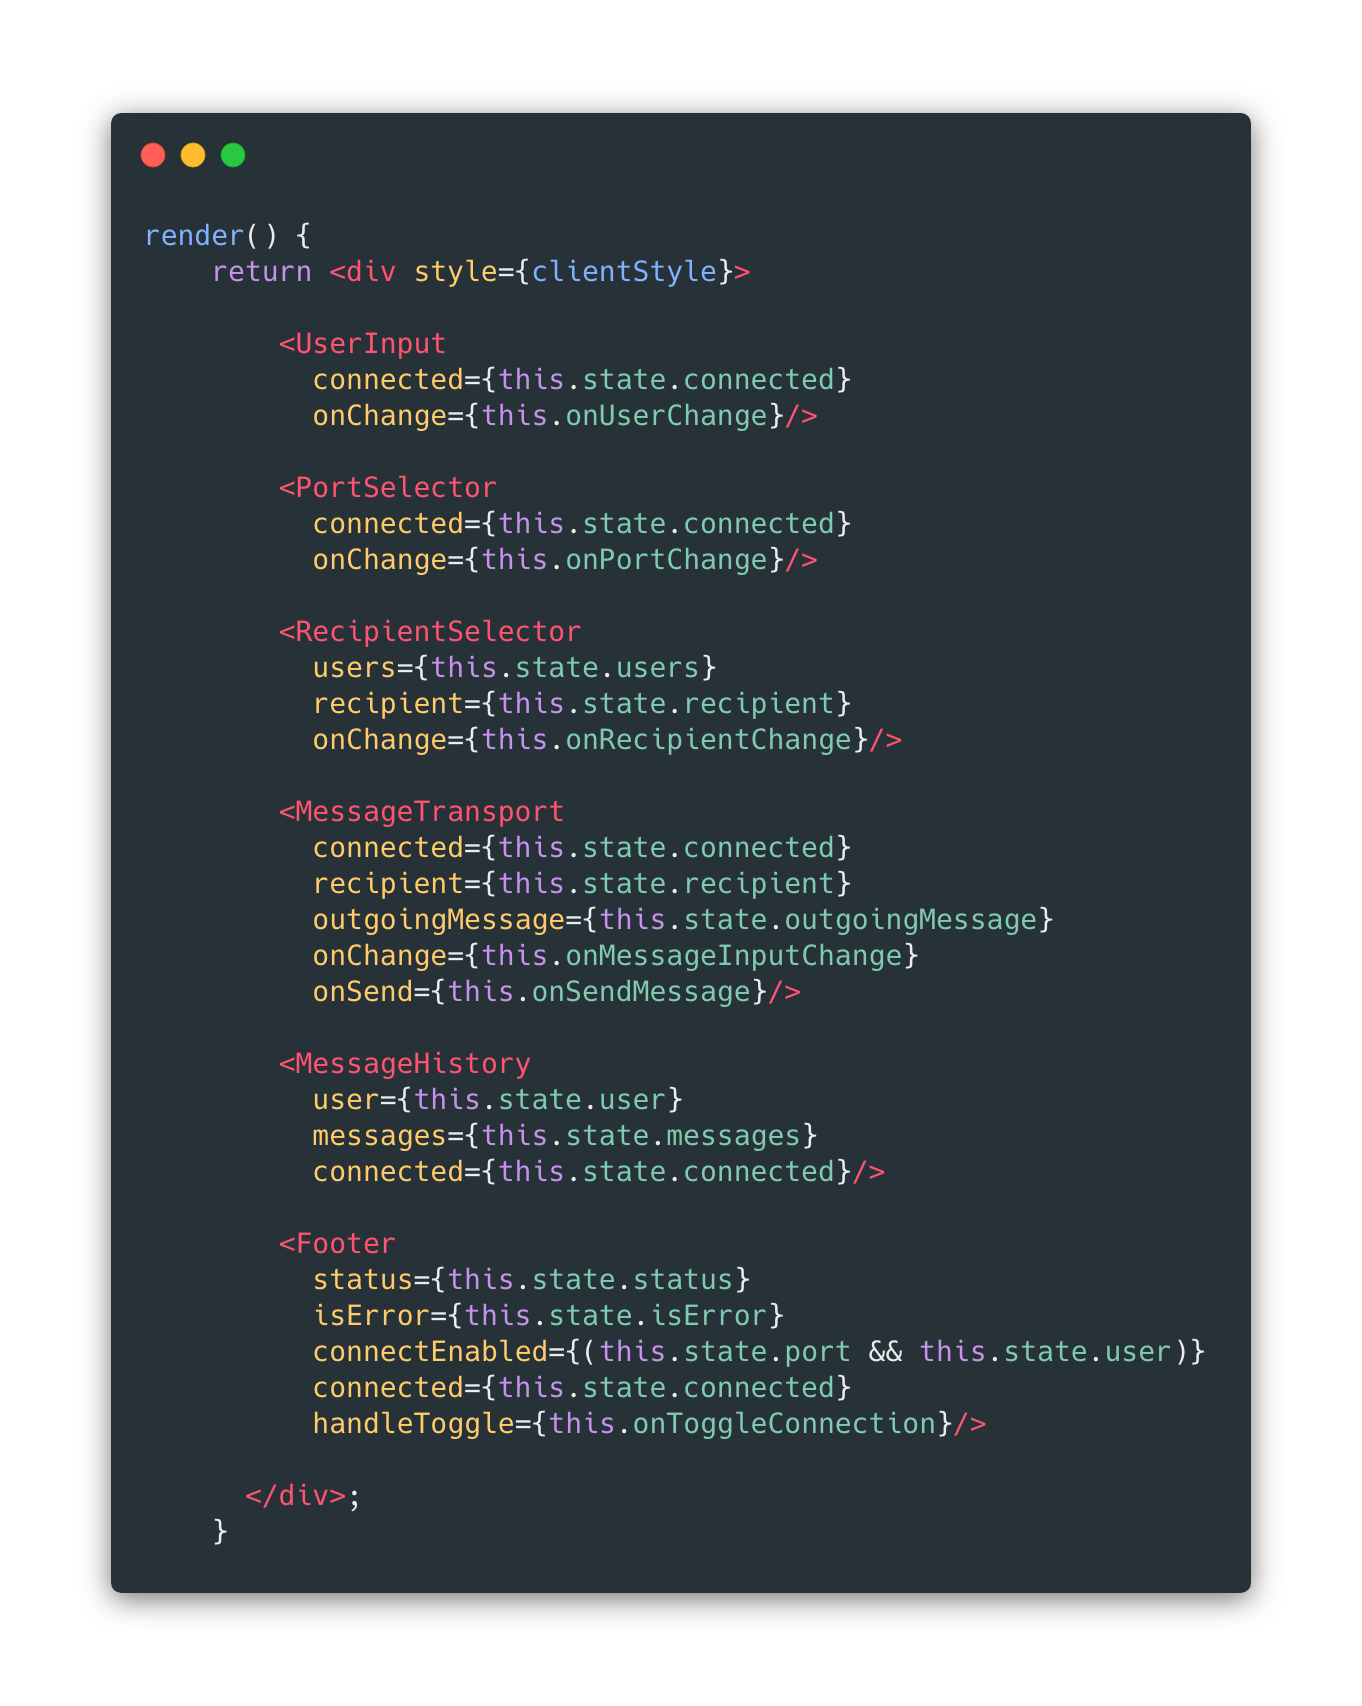
NOTE: This is a bit of an improvement, but I assure you we’re going to vastly improve on that render function by the end of the article.
Data Flow
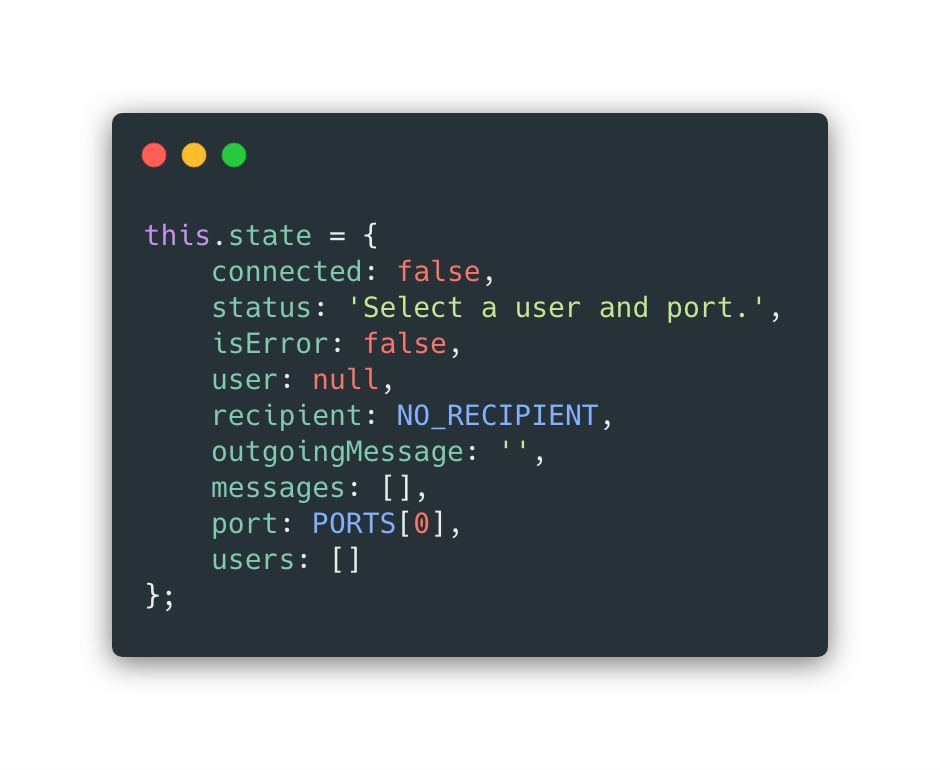
The basic premise of data flow in this Redux-less version is that the top-level Client component initializes all the state in its constructor:
and then passes the bits of state and callbacks that modify it down to the child components as props, like so:
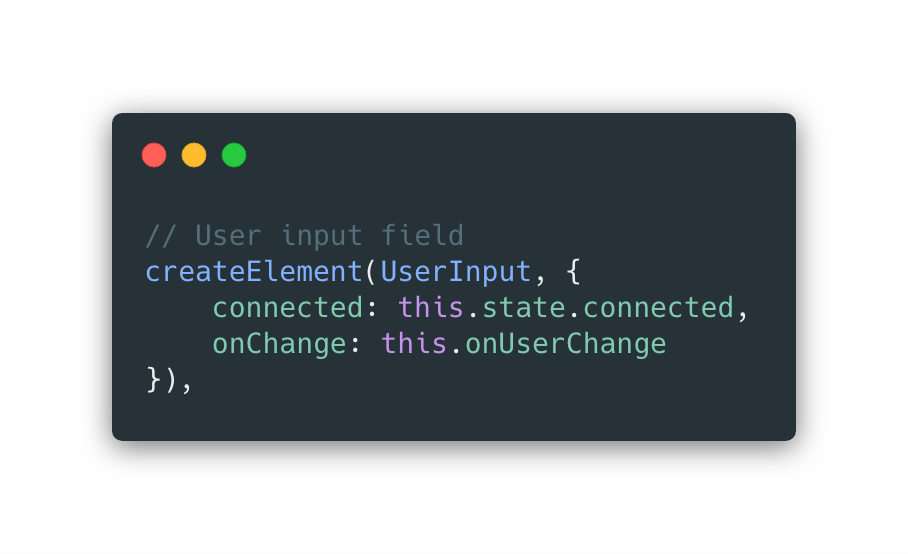
In this case, the onUserChange callback being passed to the ConnectButton instance looks like:
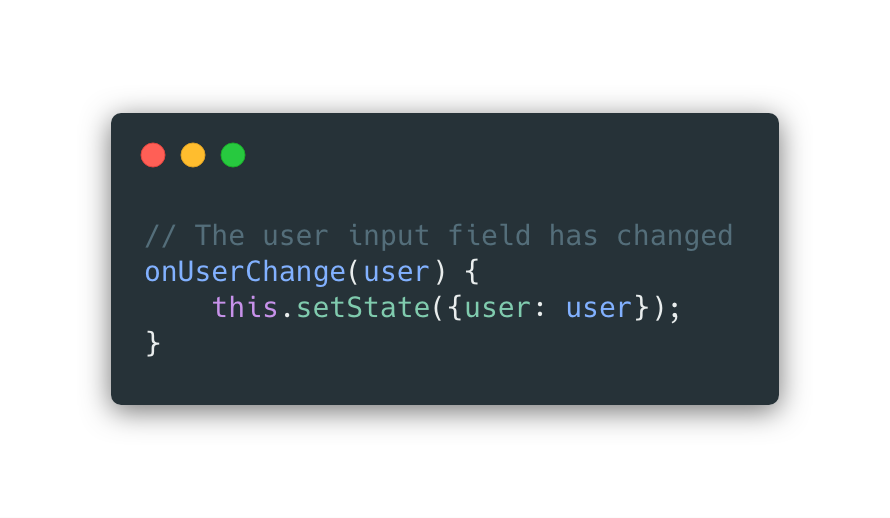
So when the UserInput component’s text input field changes, triggering a call to onUserChange, the Client component changes the state, causing React to re-render.
That’s all easy enough, and it’s nice that React takes care of re-rendering when state changes. But in the real world this approach doesn’t scale. Components need to go into their own files, JSX is really much easier for us to work with, and most teams like some variant of the Flux pattern for managing application wide state, because it’s easier to modularize and extend as a project grows.
The Full Monty: React with Redux and Bindings
Adding Redux introduces additional complexity, and greatly increases the number of files and folders in the project. It also requires some additional dependencies and a change in process for building and serving the client.
No longer is it sufficient to pull in the libraries in script tags and serve a template from our simple Node/Express server. Now, we’ll define our dependencies in package.json and pull them in with ‘npm install’.
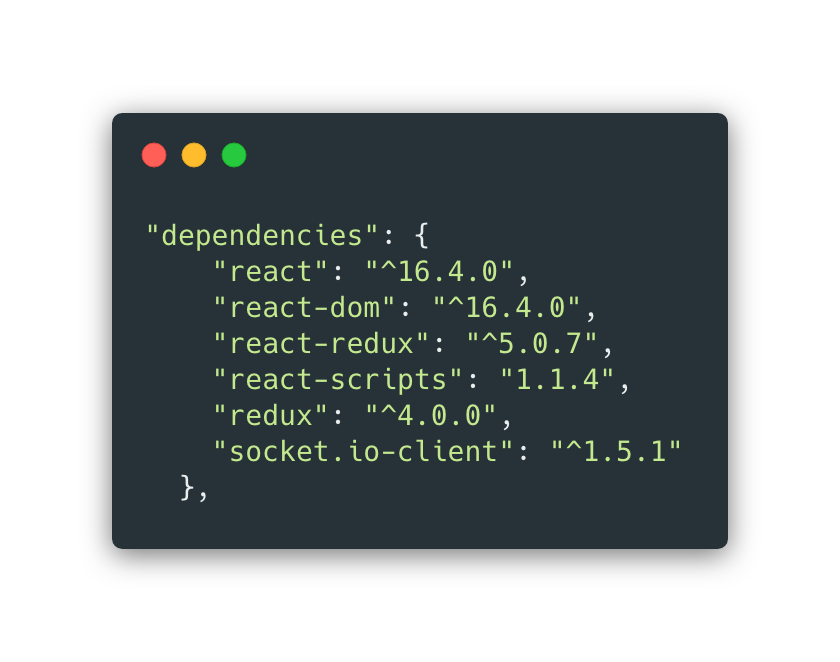
New Dependencies
I didn’t introduce Babel, Webpack, and Browserify for this; the react-scripts library was sufficient. It not only gives us the ability to use JSX, but it also compiles all the code into a bundle.js file and serves our client, even triggering the browsers to reload when the code changes.
Another library I added was react-redux, the official Redux bindings for React. Redux can be used on its own or with other frameworks like Vue, but if you’re using it with React, this library makes it much simpler to integrate the two.
Here are our dependencies now:
Application Structure with Redux
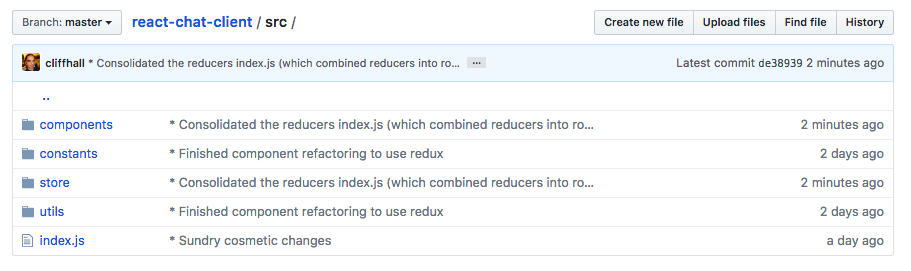
Remember how all the code was in four files under one folder before? It’s all spread out now, and the monolithic nature of the original app is no more. There’s room for growth.
Here’s how it breaks down:
Source folder (top level)
 Components folder
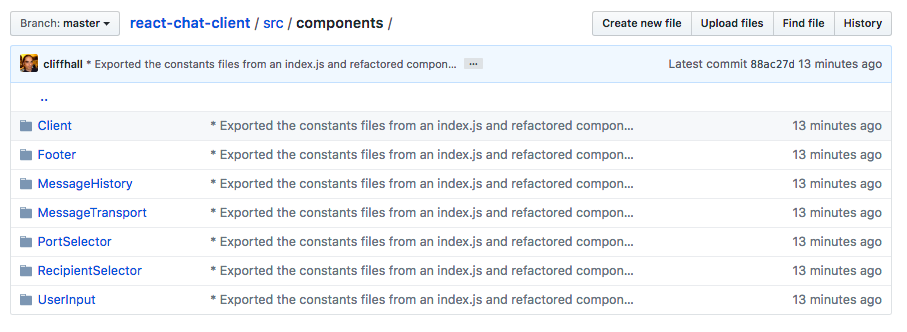 Constants folder
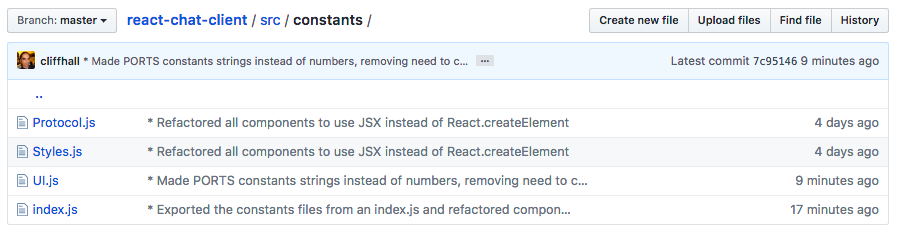 Store folder (top level)
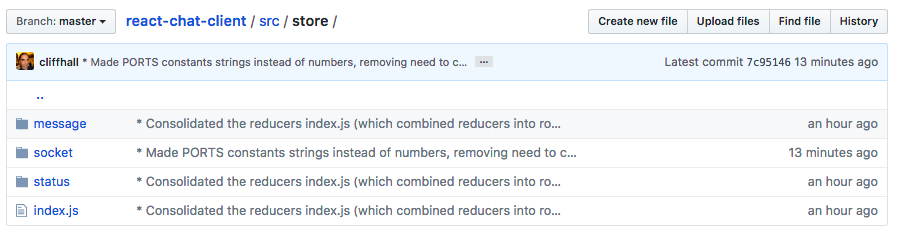 Store folder (functional area)
Utils folder
As I describe the major changes to the app below, all these folders will make more sense. You can peruse the completely refactored code in the latest version, but if you just want to read on, don’t worry, I’ll provide links to both versions again at the bottom.
Data Flow Revisited
Actions and Action Creators
In Redux, all of the application’s state is held in a store, and the only way to modify it is via an action. This means that all those setState() calls in the Client component are now verboten. Instead, we dispatch actions, which are just plain objects with a ‘type’ property and optionally some other arbitrary properties depending upon what we’re trying to accomplish. The dispatch method actually lives on the store, but as we’ll see in a bit, react-redux can inject that method into our components to make life easier. We never have to interact with the store directly.
With actions, we’re delegating the change of state that was happening inside components to another part of the system. And since we might need to dispatch the same type of action object from multiple places in the app with different property values, we don’t want to duplicate the effort of declaring it (and possibly have the two places get out of sync during ongoing maintenance), so there is the additional concept of action creators. Here’s an example:
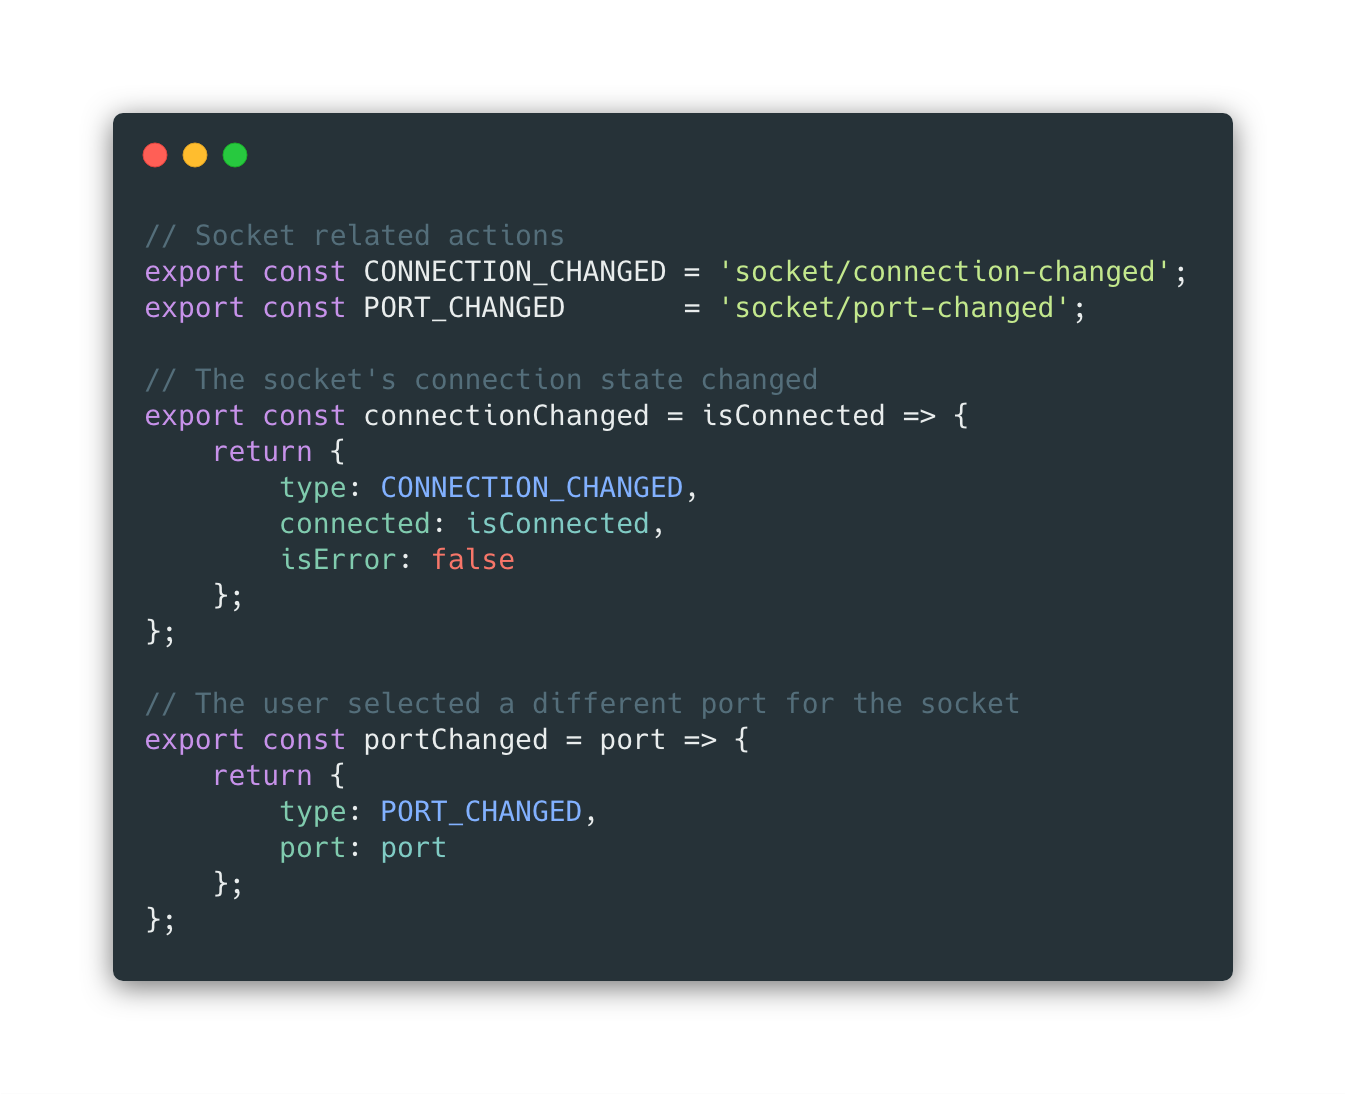
Reducers
Most dispatched actions will be handled by a reducer, which is just a pure function which returns a new value for state. The reducer is passed the state and the action, and returns a new state object with all the same properties, though it may contain replacement values for all, part, or none of those properties, depending upon the type of action that was sent in. It never mutates the state but it can define the initial state if none is passed in. It can be said to reduce the combination of state and an action to some new object to represent the state. Here’s an example that responds to the actions created in the code above:

Notice that the reducer switches on the action’s type field and produces a new object to replace the state with. And if the action type doesn’t match any of its cases, it simply returns the state object that was passed in.
Creating the Store
We’ve seen the action creators and the reducers, but what about the store that holds the state?
In the previous version of the app, the state was created in the Client component’s constructor as one object with all its properties. Do we just create the store with that same monolithic state object? We could, but a more modular way is to let each reducer contribute the parts of state that it works with.
As you’ll notice in the reducer above, the INITIAL_STATE object has two properties with their initial values. It manages the parts of state that are related to the socket. There are also reducers for the client status and for messaging. By decomposing the state into separate functional areas we make the app easier to maintain and extend.
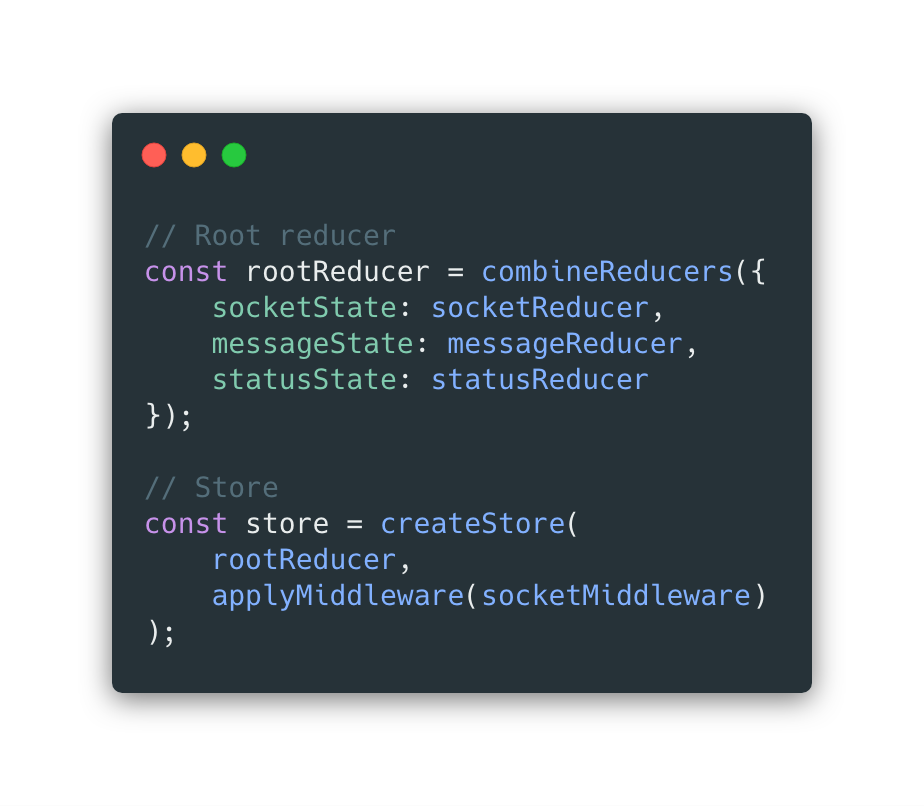
The first step to creating the overall state that the store will hold is to combine all the reducers:

The rootReducer is a single reducer which chains all the reducers together. So an action could be passed into the rootReducer and if its type matches a case in any of the combined reducers’ switch statements, we may see some transformation, otherwise no state change will occur.
Also, note that the object we define and pass to the combineReducers function has properties like:
messageState: messageReducer
Recall that the result of a reducer function is a slice of application state, so we’ll name that object appropriately.
With the rootReducer assembled, we can now create the store, like so:
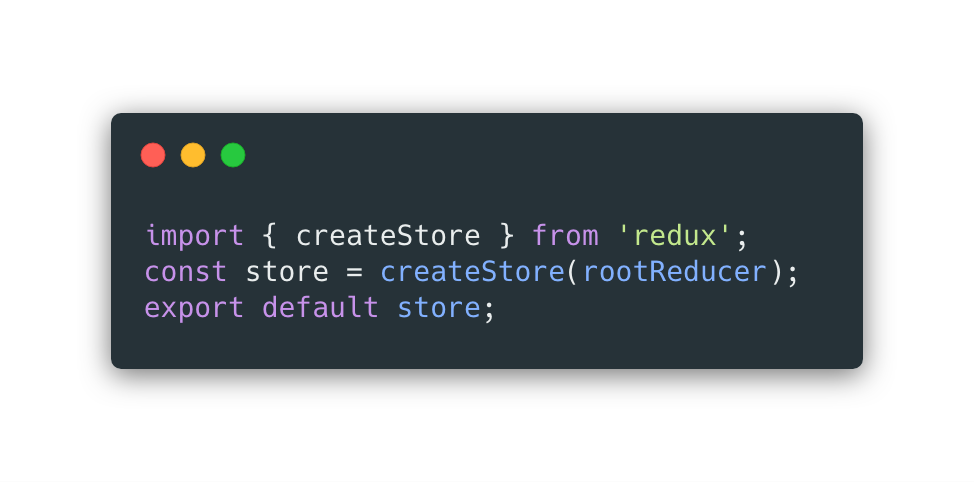
The Redux library’s createStore function will invoke the rootReducer with no state (since it doesn’t yet exist) causing all the reducers to supply their own INITIAL_STATE objects, which will be combined, creating the final state object that is held in the store.
Now we have a store that holds all the application state that was previously created in the Client component’s constructor and passed down to its child components as props. And we have action creators that manufacture our action objects, which when dispatched will be handled by reducers, which in turn produce a new state for the application. Wonderful. Only two questions remain:
- How is a component notified when the state changes?
- How does a component dispatch an action in order to trigger a state change?
Injection
This is where the react-redux library really shines. Let’s have a look at the MessageInput component, which manages the text field where a user enters their chat handle:
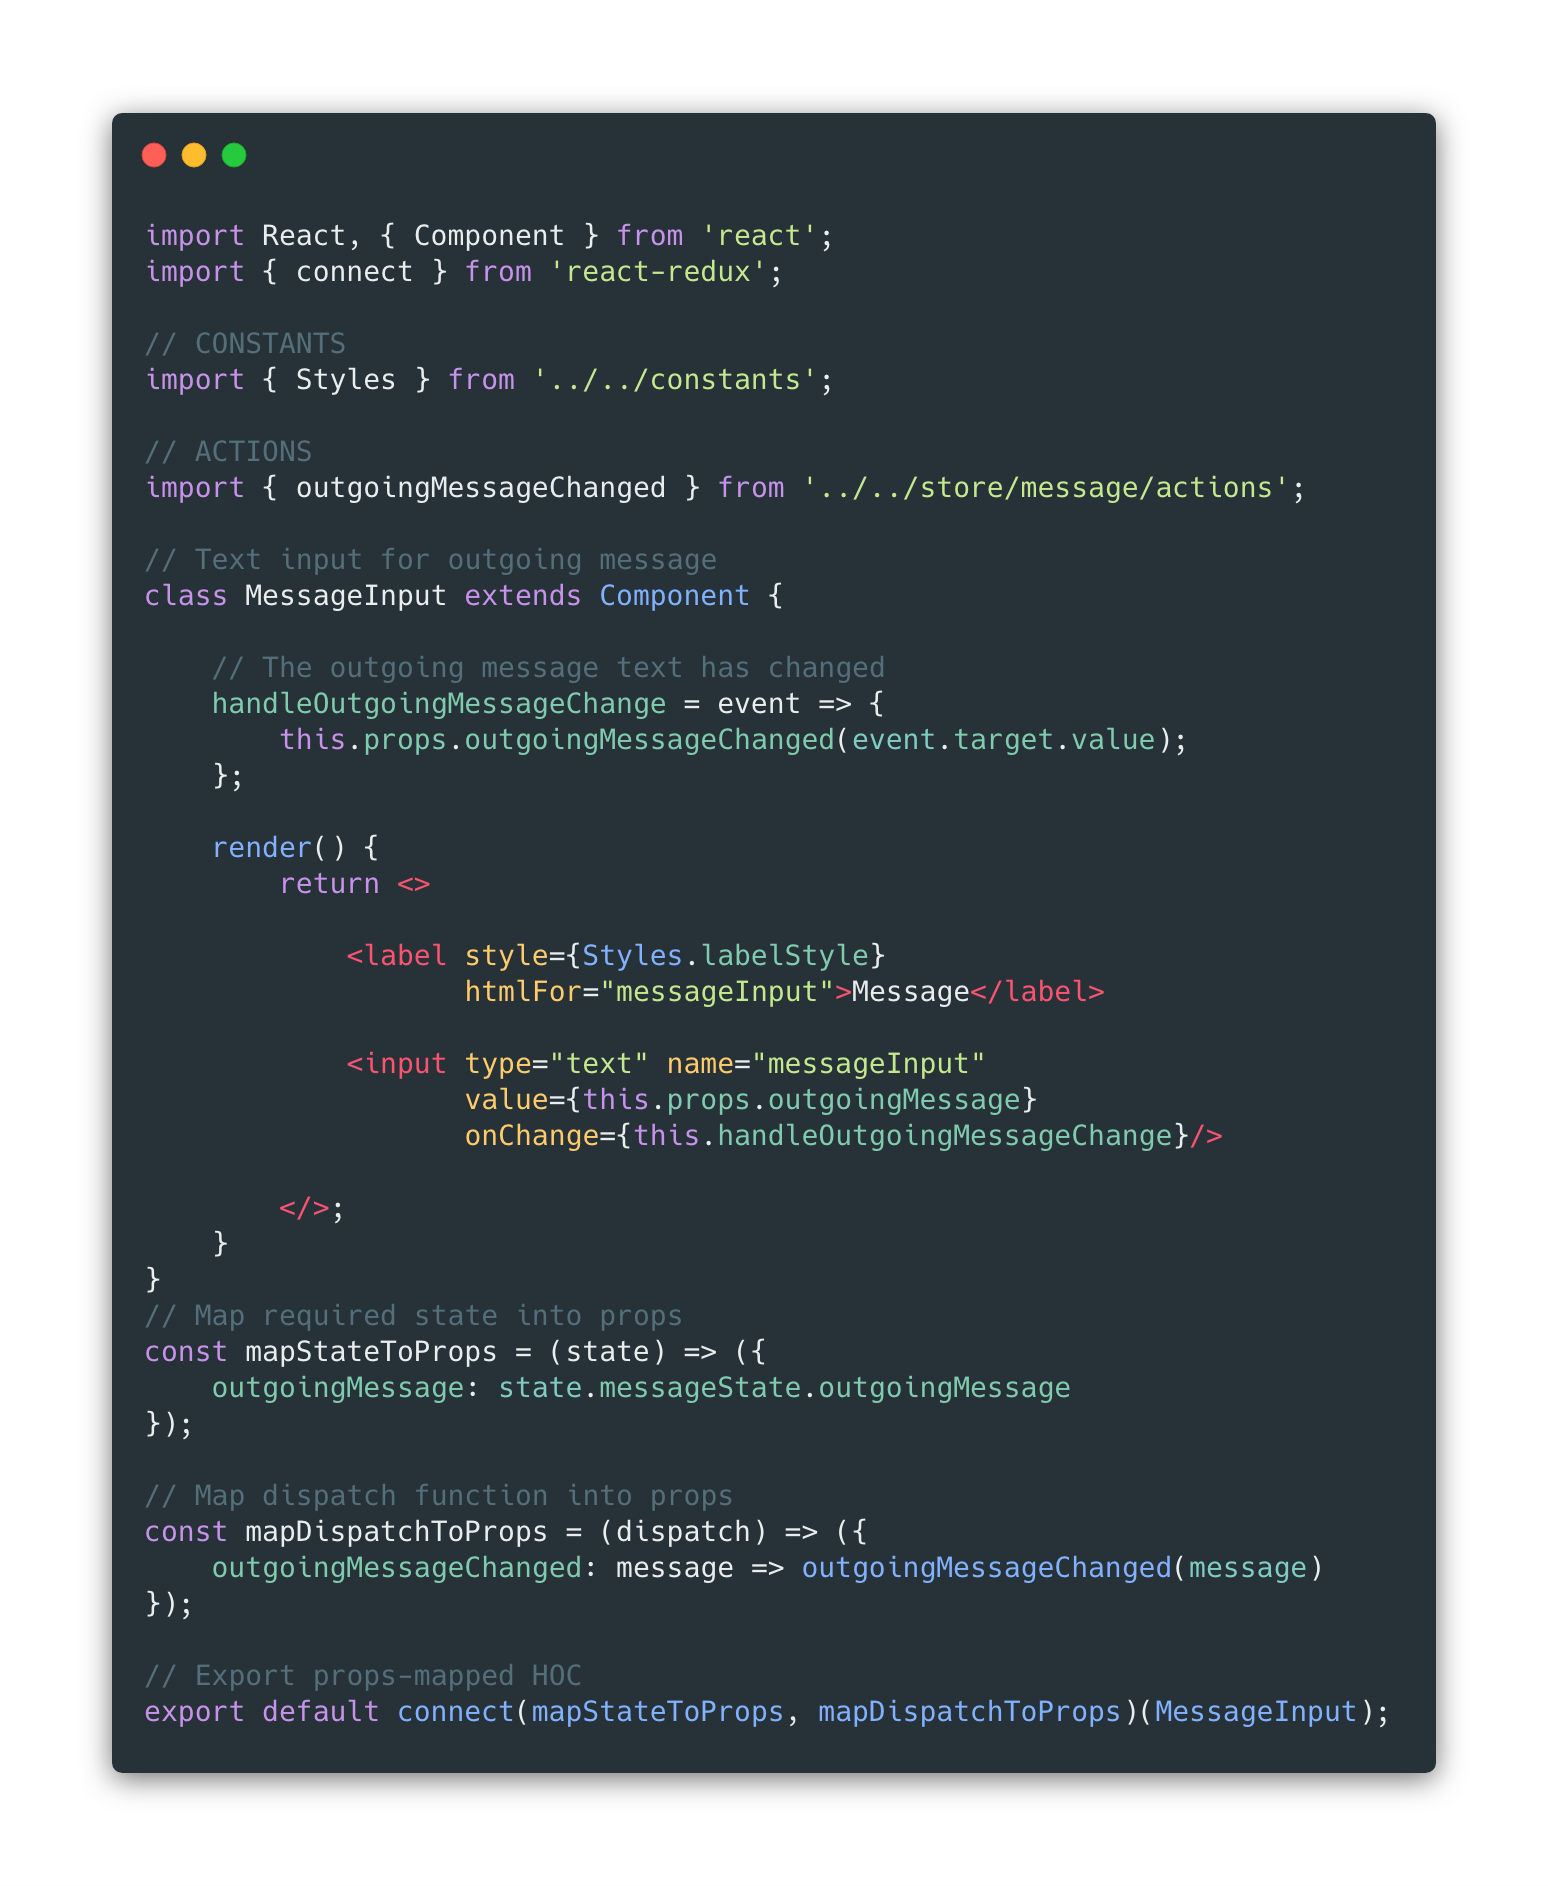
First, notice that the MessageInput class itself doesn’t have an export keyword on it.
Next, direct your attention to the bottom of the file, where you’ll notice two functions ‘mapStateToProps’ and ‘mapDispatchToProps’. These functions are then passed into the imported react-redux function ‘connect’, which returns a function that takes the MessageInput class as an argument. That function returns a higher-order component which wraps MessageInput. Ultimately, the HOC is the default export.
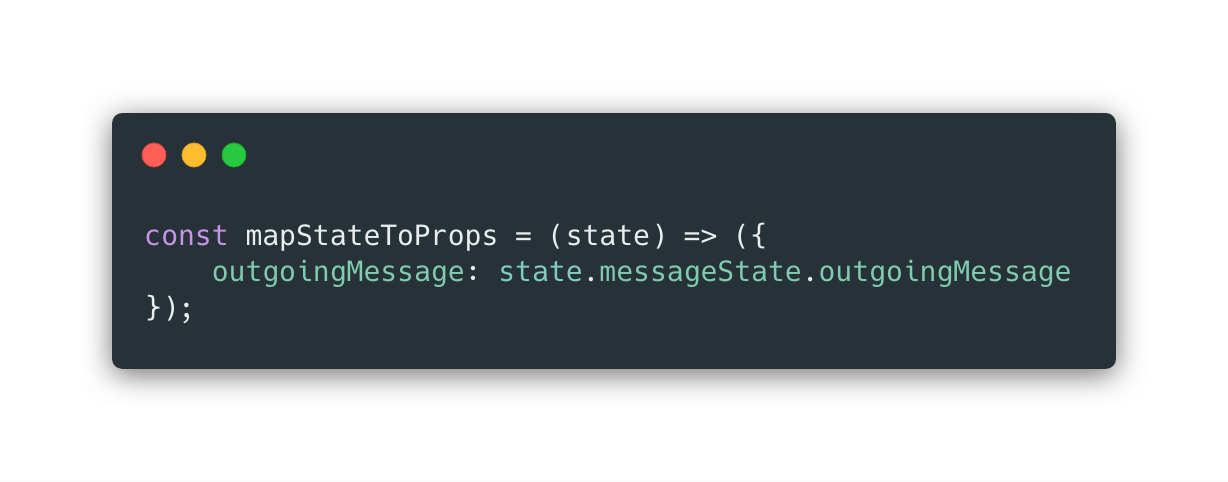
The magic that’s provided by this HOC is that when the state changes, the mapStateToProps function will be invoked, returning an object that contains the parts of state that this component cares about. Those properties and values will now show up in the component’s props.
Earlier, when we combined the reducers, remember how we named the slices of state? Now you can see where that comes into play. When mapping state to props inside a component, we can see that the application’s state object holds the output of each reducer in a separate property.
Finally, the mapDispatchToProps function is called, which creates a ‘dispatcher function’ that shows up as a component prop called ‘outgoingMessageChanged’.
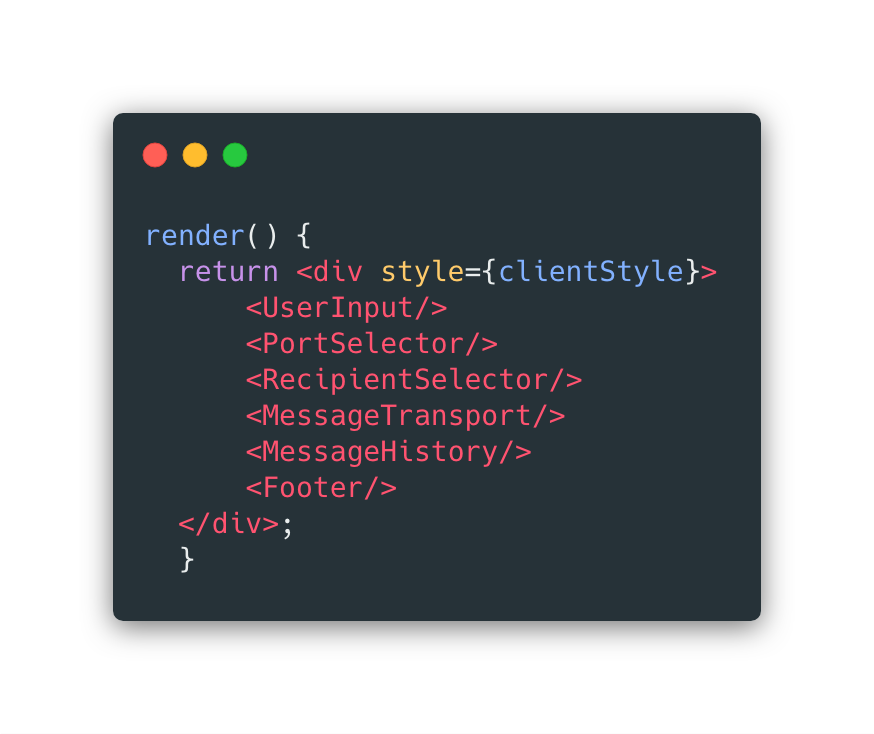
This is a much better way for components to receive parts of application state than having it passed down a component hierarchy where intervening components may not care about the values, but must nevertheless traffic in them since their children do.
Remember earlier, what the Client component’s render function looked like after refactoring to JSX? It was definitely easier to read than the version based on nested React.createElement() calls, but it still had to pass a ton of state down into those children. I promised we’d streamline that and with react-redux, this is what it looks like now:
So we’ve answered the first question: How is a component notified when the state changes? What about the second one: How does a component dispatch an action?
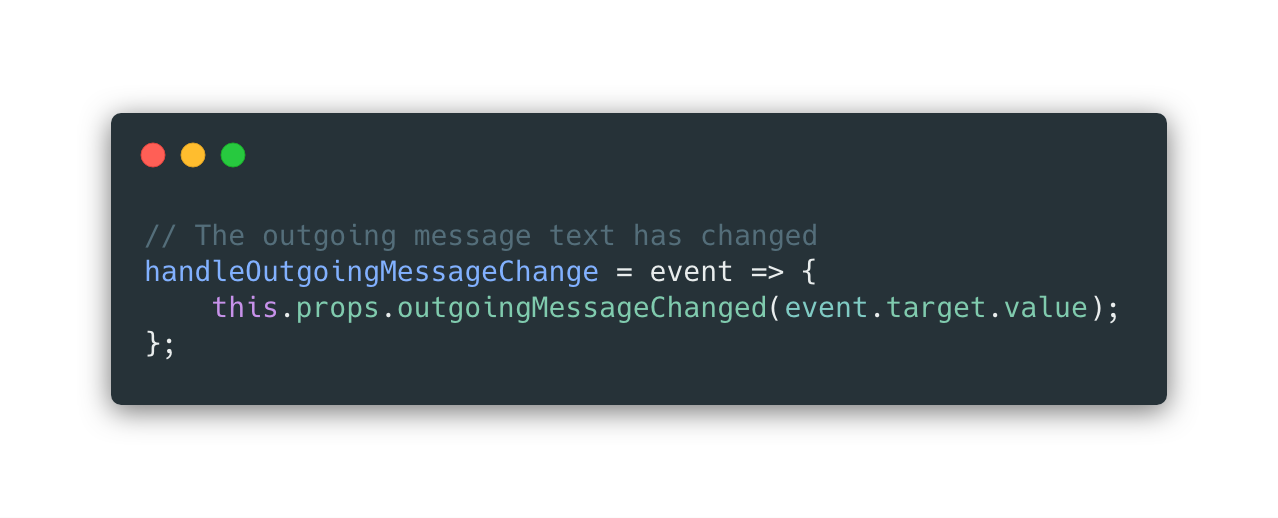
We know that a dispatcher function has been added to the component as a prop by react-redux. That dispatcher calls the appropriate action creator, and dispatches the action returned. In the case of the MessageInput component above, it calls the injected dispatcher function ‘outgoingMessageChanged’ to dispatch the an action when the text input changes:
And that’s brings us nearly full circle. Components now have the necessary bits of application state injected into their props, and are able to easily create and dispatch actions that trigger reducers to transform the state. Application state has been decomposed into functional areas along with corresponding action creators and reducers.
The final architectural concern is the socket and its management. Where do we instantiate it, and how communicate with it?
Middleware
It isn’t a view component, but a couple of view components (ConnectButton and SendButton), need to initiate communications with it. Actions like CONNECT_SOCKET or SEND_MESSAGE are a great way to trigger things elsewhere in the application. But the reducers that respond to actions are supposed to be pure functions that only manage the state. How can we send an action and have that trigger a manipulation of the socket then?
The answer is middleware. Remember before when we created the store? Well, actions are part of the API for the store, so it makes sense that something that needs to respond to an action would probably need to be involved.
What we’ll have to do is create a ‘middleware function’ which will instantiate the socket and its various listeners, then return a function which will be called on every action that is dispatched. That function is wrapped by the closure that created the socket instance, and is around for the life of the app. It looks like this:
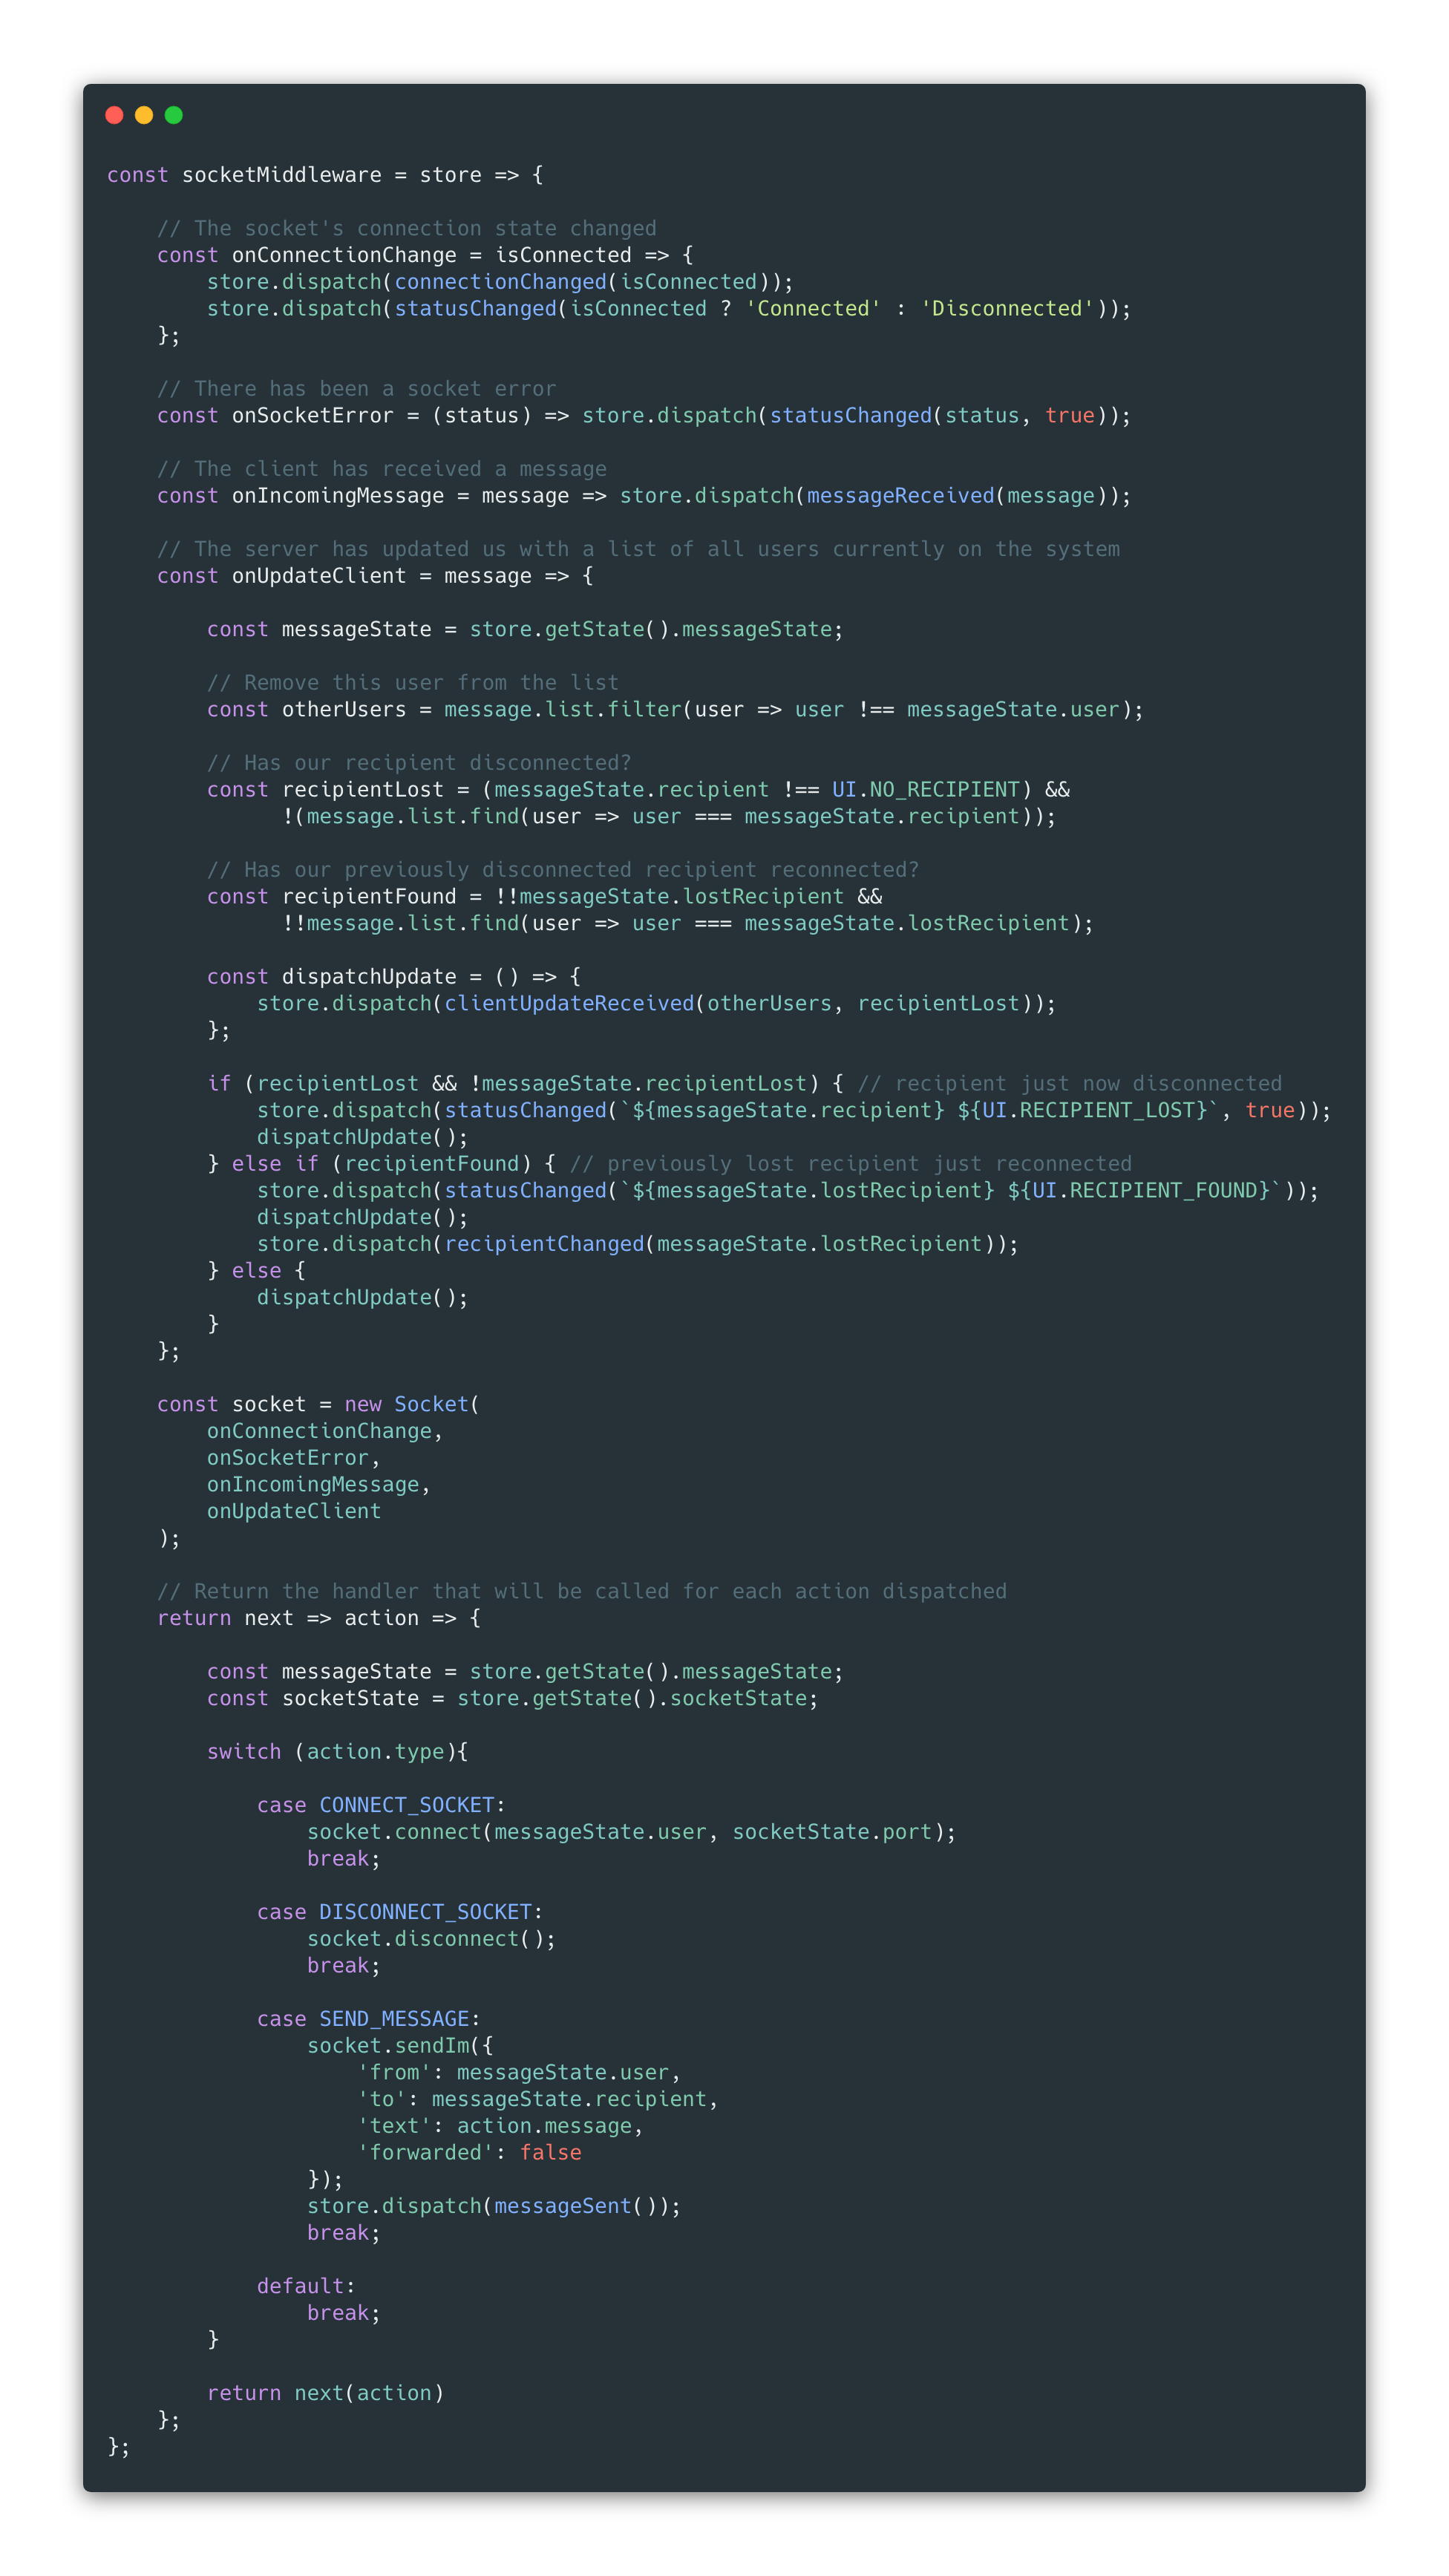
This middleware function is able to instantiate the socket and respond to the actions that are related to the socket (connecting, disconnecting, sending messages), as well as dispatching actions that arise from the socket itself (connection status change, socket error, message received, update client with list of connected users).
We apply that middleware to the store when we create it like so:
Conclusion
If you’re just starting with React, you certainly don’t need to absorb all that toolchain fatigue just to get your feet wet. With just React and ReactDOM, you can make something happen and get to joy pretty quickly.
However for anything even moderately ambitious, you’re probably going to be well-served by upping your application’s state-management game. There are plenty of libraries out there to help you with this, Flux, Redux, MobX, RxJS, etc., so you may want to study up on the pros and cons of each. You’re definitely going. to see an apparent increase in complexity when you refactor how your app handles state, but that’s necessary for the app to grow in a maintainable way
I hope you’ve enjoyed this little exercise and now have a better understanding of what’s involved in refactoring a React-only app to use Redux. Here again, for reference, are the two versions of the project:
- React and ReactDOM only (Version 1.0.0)
- React, ReactDOM, Reflux, react-reflux (Latest Version)
I’d love to hear your thoughts and questions on this in the comments below.