
 If you want to run unit tests against code that manipulates a Firebase database and creates users, there are a few things you’ll need to do first. Regardless of the unit testing framework and how you break down the tests within your test suite(s), you will need to do a few things before you write any tests:
- Create a dedicated test project on your Firebase Console.
- Enable (at a minimum) Email-based Authentication.
- Add the Firebase Admin SDK to your project (includes installing the library and downloading your account admin credentials into a JSON file which will be used to perform admin operations like deleting users).
- Add the normal Firebase Client SDK to your project as well, so that you can perform operations in your tests as normal users.
- Configure the database rules in your testing project. Make sure these are redeployed to your test project each time you make a change intended for production.
All those are easy and relatively painless. As I’ve said before, Firebase rocks. However, there is one more bit of preparation that isn’t immediately obvious how to do:
- Write a script to delete all users and blow away the database at the beginning of each test suite run.
Creating a Firebase Tabula Rasa
Ideally, we want to reset the database and its list of user accounts to a blank slate before each test run. If our test scripts create the same accounts with the same data every time, we’ll run into trouble with those user accounts already existing.
We could manually delete the entire project from the Firebase Console and create a new one, but that would entail downloading a new admin credentials (service account) file and putting it in place each time we run the tests. This definitely won’t work for anyone who wants to run these tests automatically with a continuous integration (CI) tool.
To nuke the database programmatically, we have to do two things:
- Remove all data in the database.
- Delete all user accounts.
Remove All Data In the Database
This part is super easy. So easy it’s scary…
admin.database().ref().remove();
And boom goes the dynamite. But… we don’t necessarily want to do this first. We might need to refer to the data in order to remove the accounts, which it turns out is nowhere near as simple.
Deleting All User Accounts
Is there a ‘nuclear option’ to delete all users?
Since we don’t care at all about the accounts, it would really be nice if we could use the Firebase Admin SDK to do something like this:
admin.auth().deleteAllUsers();
Alas, there is currently no such method. Firebase team, if you’re listening, please add this and I’ll buy you a beer.
Ok, Can I Fetch All Users and Delete Them One by One?
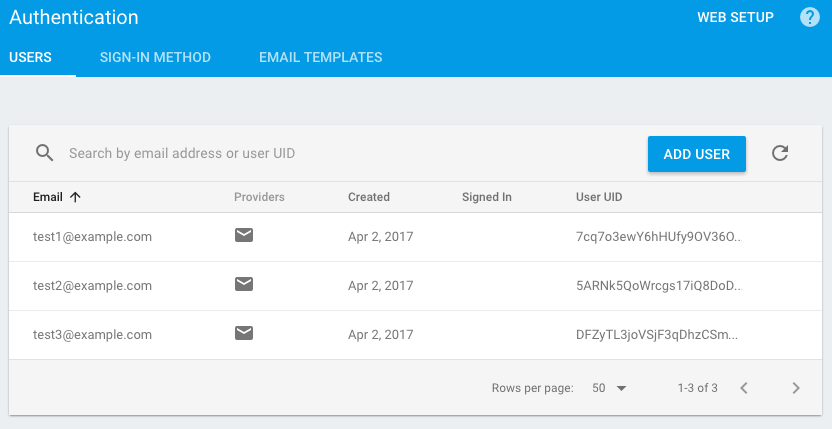
Firebase Console fetches all users, even if there’s no data in the DB, why can’t I?
Considering that the Firebase Console can show us a list of users even if they have no representative data in the database, surely we can do something like the following, right?
admin.auth().getAllUsers()
    .then( () => {
        // Delete each user with admin.auth.deleteUser(user.id)...
    })
    .catch( error => console.log(error.message) );
Nope. There must be an undocumented function in the Firebase Admin SDK, or perhaps the Firebase console is running a superset of that SDK, but I’ve searched all the docs and have thus far found no way to fetch all user accounts with one call.
I posed the question on the Firebase Slack Community and a Google Developer Advocate told me that you can’t do that with the Admin SDK yet, but that you can with the CLI. That’s nice, and if you’re going to manage your own backend, you might be able to script the CLI to export and import user accounts. In that case, feel free to look into that and let us know what you find out in the comments below.
Personally, I’m focused on building this with the Firebase JavaScript SDKs, because I intend to deploy it to the Firebase Cloud Functions Node.js hosting.
So, let’s consider a few approaches we might take to obtain this list of users that need to be deleted.
1. Write generated user ids to a local file as they’re created by the tests
The beauty to this approach is that even if we delete the user data from the /users node in a subsequent test, we still hang onto the uids that get generated when a new user is created. Then, when we run the tests again, we just rip through this file and delete each user.
The downside, of course, is that the file would require a lot of management, and it isn’t terribly fault tolerant.
Every single test that creates a new uid will have to append it to this file, and if anything goes wrong, the file may end up incomplete or corrupt.
Further, even if the file is written successfully each test run, we have to delete the file after we’ve axed each of its users from the database on the next test run.
If the process fails for any reason, we’re hopelessly out of sync. Therefore, we’ll just write this option off as unacceptable.
2. Predefine users to be created by the tests, and use that list to delete all users at the start of tests
When you create a user in Firebase using the Admin SDK, you can supply a UserRecord, with it’s own predefined uid. That means you can create a reference file of users to be created by the test suite and use that same file to delete all users each time you run the suite.
This is probably the best approach, but how you go about creating those users in the tests is a point to consider. Although each test should theoretically execute in a stateless vacuum, if users of your application typically have to interact with other users, creating them inside each test could be a hassle.
You might want to have a separate set of accounts to be created (along with their data) for each test suite, and have the suite make its assertions based on what’s contained in that setup data.
Or you could have one big file of users and pop one off the stack inside each test that needs to create a user account.
Since there are different ways this approach might be implemented, I’ll just note that it’s probably the best one to explore for a production setup.
3. Read the /users node of the db and delete each represented user
The obvious flaw in this approach is that if an account exists which isn’t represented in the /users node (or wherever you plan to store user profile data), then that account will not be removed.
Maybe this is a plus for you, if you want to have accounts that persist across runs of your tests for other reasons. I don’t suggest doing that in your testing project, but if you have a good reason to, then below is a fairly complete answer for you.
More likely is the case that your unit tests will end up deleting a user profile to prove that the rules allow it for the authenticated user but not for a different user.
In my case, I just wanted to prove I could delete all the users with the Admin SDK if I knew their ids. This approach had the benefit of being quickest to get running, since I could add users and data manually on the Firebase Console and then run my Node script against them. And as long as I don’t end up deleting user nodes but leaving their accounts present in the unit tests, it’ll work fine.
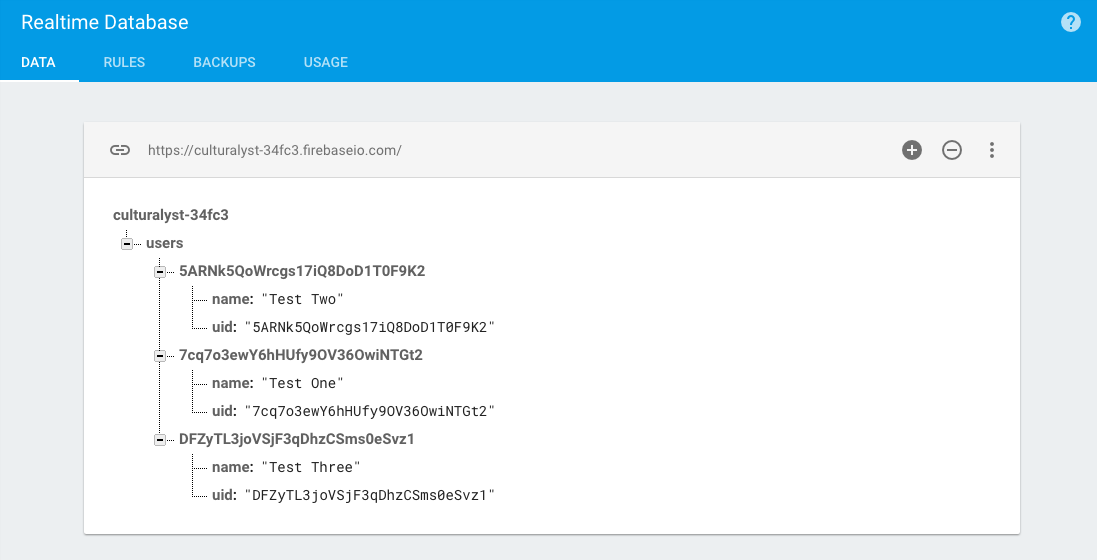
Below is the data we’ll be reading. Under the /users node, there is one entry per user with a name and a uid field. We’ll fetch all this data, delete the corresponding accounts, and finally delete the root node of the database.
The code looks like this:
// NOTE: Accounts that are not represented in your /users node will not be deleted!
"use strict";

// Get credentials and initialize firebase app
console.log("With the power vested in the admin user, lay waste the database and all its users!");
let admin = require("firebase-admin");
let serviceAccount = require([__dirname, "service-account-key.json"].join('/'));
admin.initializeApp({
    credential: admin.credential.cert(serviceAccount),
    databaseURL: "https://your-database-name-here.firebaseio.com"
});

// Fetch the /users node and begin deleting users.
// Finally, wipe the database.
let user, users = [];
let usersRef = admin.database().ref('/users');
usersRef.once('value').then( (snapshot) => {
    // Get an Array of users from the DatabaseSnapshot
    snapshot.forEach( (childSnapshot) => {
        user = childSnapshot.val();
        users.push(user);
    });
    console.log(users.length + " users retrieved");

    // Delete users then wipe the database
    if (users.length > 0) {
        // Map users to an Array of Promises
        console.log("Delete users... ");
        let promises = users.map(user => deleteUser(user));

        // Wait for all Promises to complete before wiping db
        Promise.all(promises)
            .then(wipeDatabase)
            .catch( e => console.log(e.message) );
    } else {
        // If no users to delete, then just wipe database
        wipeDatabase();
    }

    // Delete a user
    // Promise always resolves, even if user doesn't exist,
    // since a user can be deleted separately from their /users node
    function deleteUser(user) {
        return new Promise((resolve, reject) => {
            console.log("Delete user: " + user.name + "");
            admin.auth()
                .deleteUser(user.uid)
                .then( () => {
                    console.log(user.name + " deleted.");
                    resolve(user);
                })
                .catch( e => {
                    console.log([e.message, user.name, "could not be deleted!"].join(' '));
                    resolve(user);
                });
        });
    }

    // Wipe the database by removing the root node
    function wipeDatabase() {
        console.log("Wiping database... ");
        admin.database().ref().remove()
            .then( () => {
                console.log('DONE!');
                process.exit();
            })
            .catch( e => {
                console.log(e.message);
                process.exit();
            });
    }
});
And the service-account-key.json file which you can download from your console looks something like:
{
  "type": "service_account",
  "project_id": "your-db-name-here",
  "private_key_id": "b4158530b6255bd098369aa94f2313a60e1aa534",
  "private_key": "-----BEGIN PRIVATE KEY-----\nyour-private-key-here\n-----END PRIVATE KEY-----\n",
  "client_email": "firebase-adminsdk-xxxx@your-db-name-here.iam.gserviceaccount.com",
  "client_id": "your-client-id-here",
  "auth_uri": "https://accounts.google.com/o/oauth2/auth",
  "token_uri": "https://accounts.google.com/o/oauth2/token",
  "auth_provider_x509_cert_url": "https://www.googleapis.com/oauth2/v1/certs",
  "client_x509_cert_url": "https://www.googleapis.com/robot/v1/metadata/x509/firebase-adminsdk-xxxx%40cyour-db-name-here.iam.gserviceaccount.com"
}
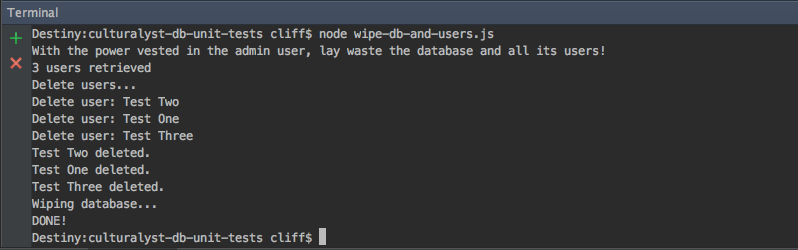
And the script output:
Conclusion
All in all, it wasn’t difficult to nuke the database and its users, but there are a few approaches to consider.
Since it’s possible that the database might not have all the user ids for the actual users (depending upon how your tests manage the /users nodes), you might want to create a JSON file with prefab users, ready to be created by a setup script prior to running tests and read that same file (or files) when you nuke the database at the beginning of a test run.
But as long as your user accounts always have a representative node in the database once the tests have run, the above code should work fine for you. Here’s that code in a GitHub Gist.
is article has been reblogged at the following sites:
Did you find that there’s no rate limiting of the admin SDK? I think it would be safer to run the deletes just say 2 at a time. I tried using await with deleteUser, but couldn’t get the syntax to work.
Yeah, a backoff might be a reasonable improvement, but I have yet to run into any balking from the SDK.
It did work for me, but I was dealing with a small number of users, and it was the admin SDK. Either rate limiting doesn’t kick in until volume exceeds some threshold, or the admin SDK isn’t limited. I’d say it’s the latter, because you wouldn’t be using the admin SDK in user applications.
The user removal is limited to 10 requests per second. Did you find how to exceed this limit?
Thanks in advance!